Create a members only website with a CMS with low-code
Written by Zack Schwartz
Intro
One of the outstanding capabilities of the Raytha content management is the ability to effortlessly set up a website that includes user and account management. With Raytha, users can create their own accounts, or administrators can create accounts on their behalf, making it easy to get started with managing your website's users.
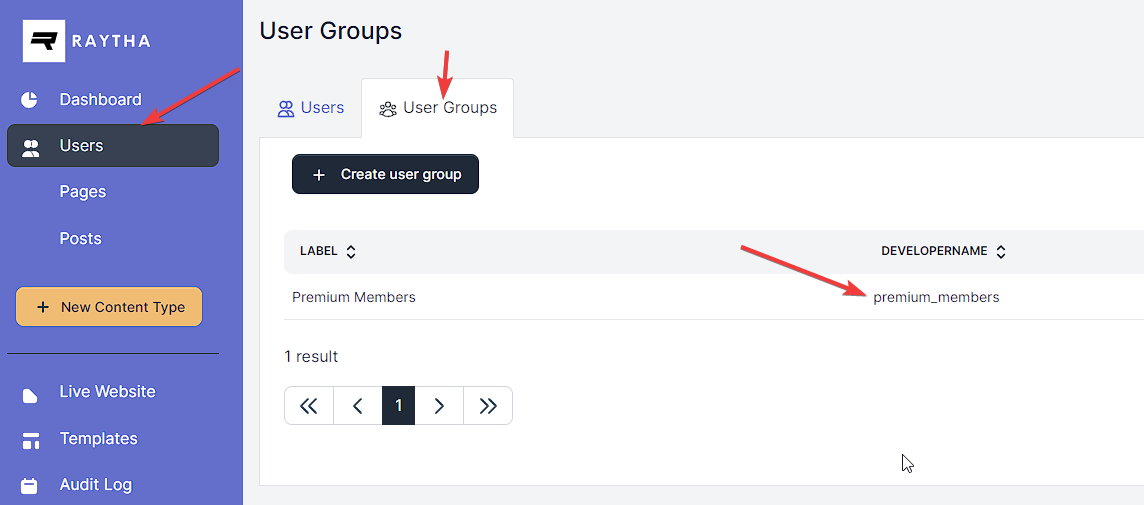
Another feature that Raytha offers is User Groups, which allows you to categorize users into different groups and manage their access to content based on their group membership. With this feature, you can control which content your users can access, making it a powerful tool for website administrators.
In this blog post, we demonstrate how quickly and easily we were able to achieve the following tasks with a fresh installation of Raytha:
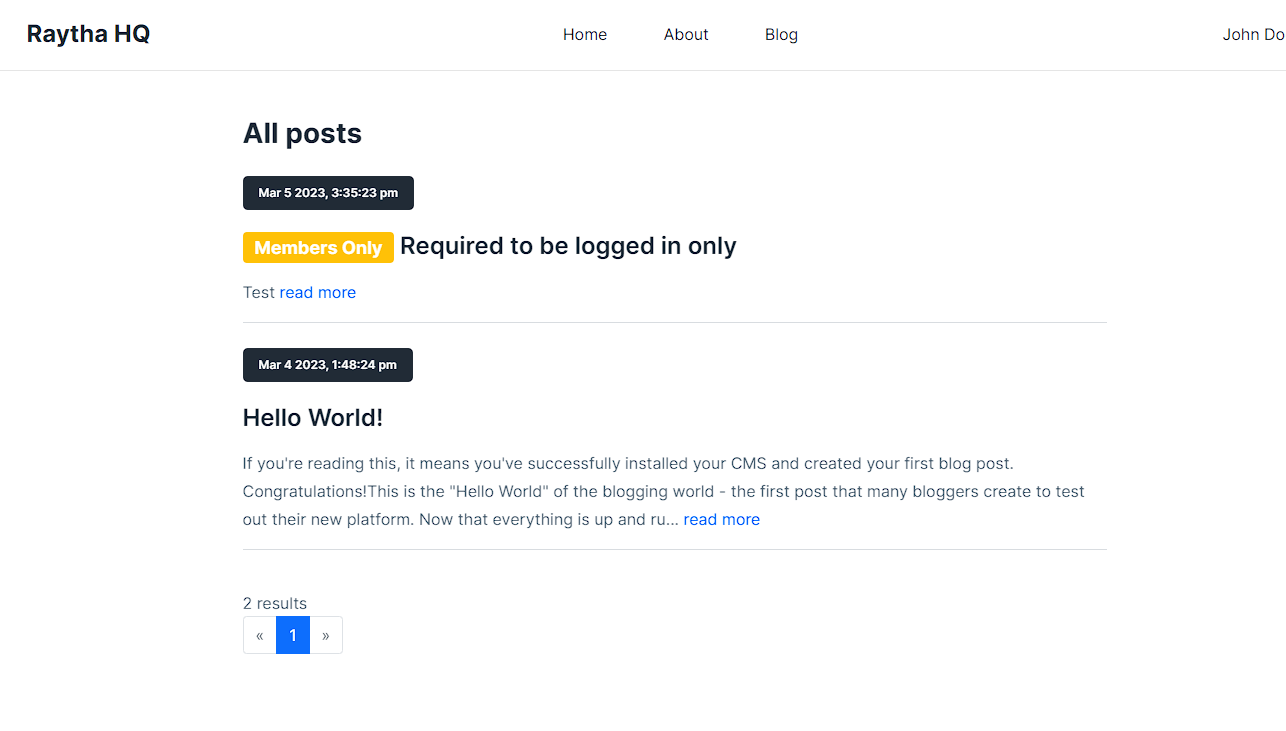
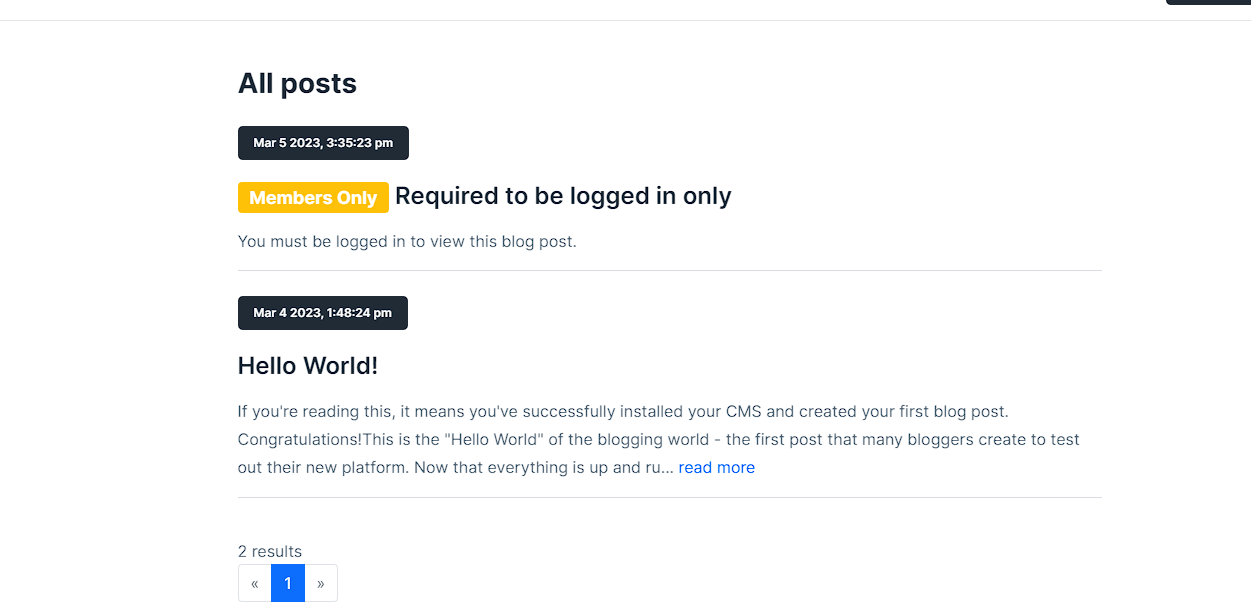
Restrict certain blog posts to only be viewable to logged-in users
Add a badge to indicate whether a post is available to members only in the list view
Create a premium content section, which only users belonging to the Premium Members group can access.
By following these simple steps, you can make your website more secure, offer premium content to your users, and manage your users' access to your website with ease.
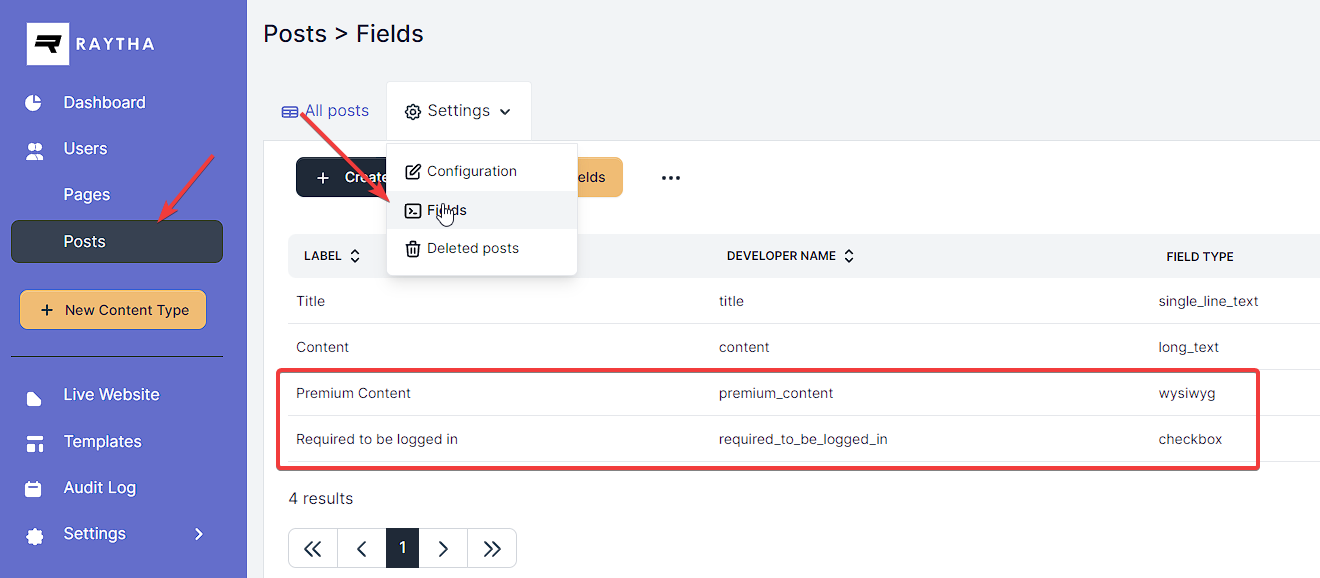
Add fields to Posts content type
To begin, we'll customize the default Posts content type that comes with Raytha. Our first step will be to add two new field types: a "Premium Content" field that will allow us to add rich, formatted content to our posts for premium users only, and a checkbox field that will let us specify whether a post requires users to be logged in before they can view it.
You can tab over to users and add a few sample users and place some of them into the premium members group for testing.
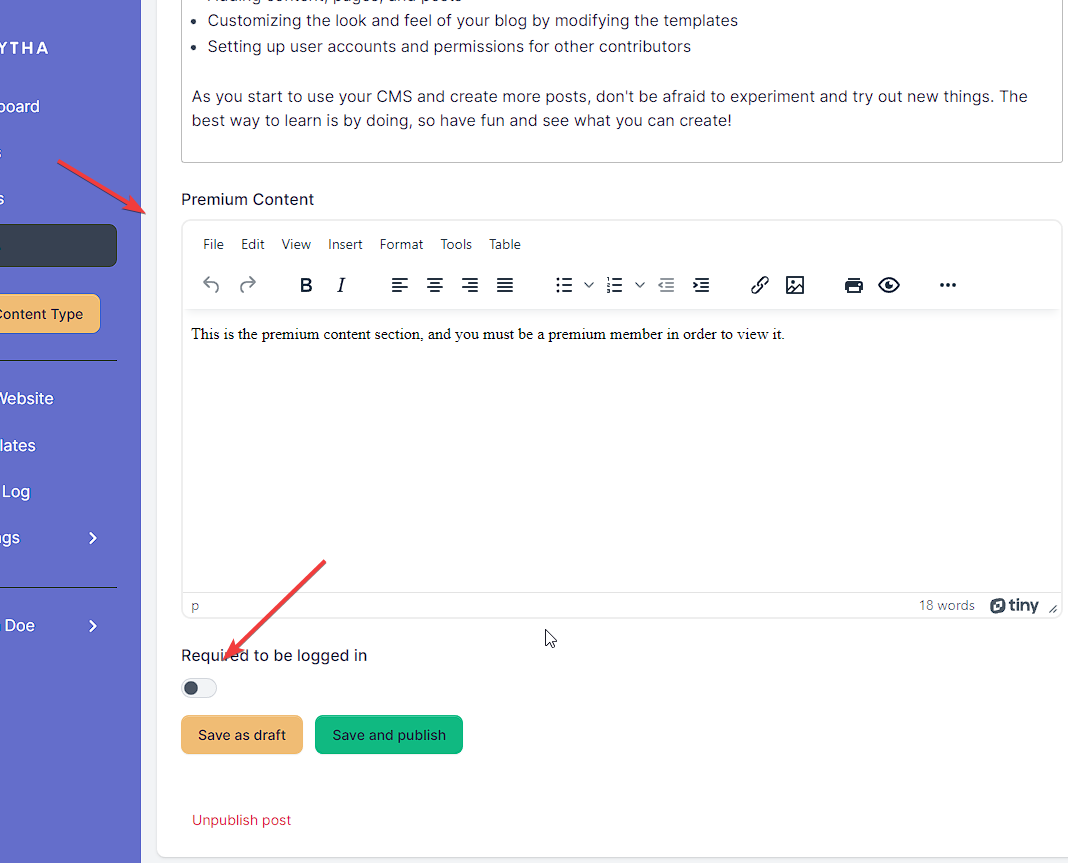
You can add a bunch of blog posts now and include a combination of posts that require users to be logged in along with premium content.
But just because we added these fields, user groups, and modified the blog posts, it does not mean that the functionality is automatic. We have to update the Raytha Templates accordingly.
Update the Raytha Liquid Templates
This is where there is a little code editing, but it is minor. We have to go into Templates and we can edit both the `content item list view` and `content item detail view`
The content item list view template code below is mostly the default but contains some modifications to check if the page requires the user to be logged in and then shows a "Members Only" badge. It also performs a check of whether the user is logged in and if the page requires the user to be logged in, it will show a different Content Preview.
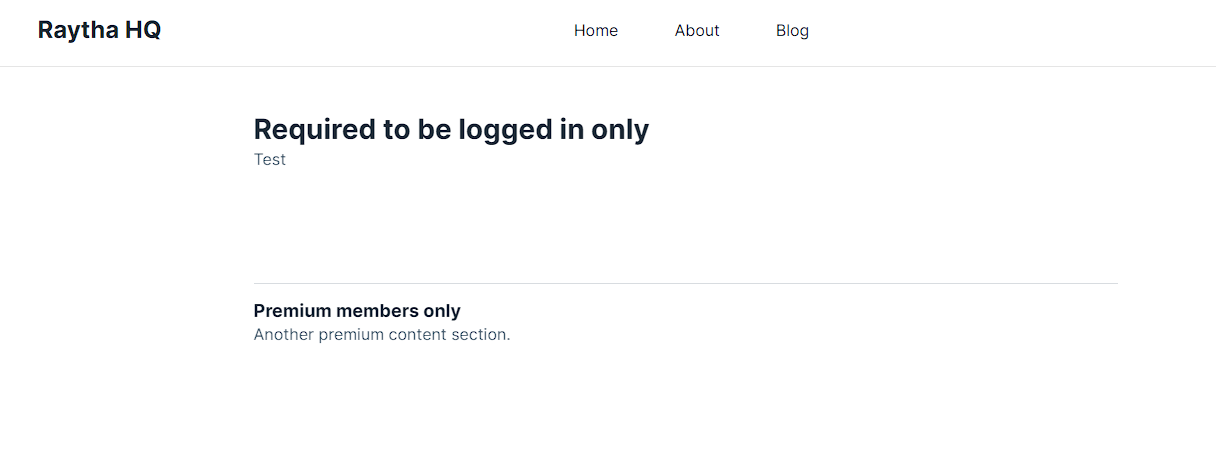
The content item detail view is very similar, but it includes an additional check to see if the current logged in user belongs to the Premium Members user group, and if so, show the premium content.
<section class="ud-wrapper ud-page">
  <div class="container">
    <div class="d-flex justify-content-center">
      <div class="col-lg-8">
        <h3>{{ Target.PrimaryField }}</h3>
        {% if CurrentUser.IsAuthenticated and Target.PublishedContent.required_to_be_logged_in.Value %}
          {{ Target.PublishedContent.content.Text }}
        {% elsif Target.PublishedContent.required_to_be_logged_in.Value == false or CurrentUser.IsAuthenticated %}
          {{ Target.PublishedContent.content.Text }}
        {% else %}
          <p>You must be logged in to view this blog post.</p>
        {% endif %}

        {% if CurrentUser.UserGroups contains "premium_members" %}
          <br/><br/><br/><br/><hr/>
          <h5>Premium members only</h5>
          {{ Target.PublishedContent.premium_content.Value }}
        {% endif %}
      </div>
    </div>
  </div>
</section>
One important item to note is that user groups do not have to be assigned manually by administrators. It is possible to automatically assign user groups to individuals if you have your own membership database or identity provider that has stored the user groups. Through the use of Single Sign On, you can assign the user groups during the authentication process. This will be covered in a future post.
ENTREPRENEUR & SOFTWARE ENGINEER, AUSTIN, TX I enjoy tackling a wide array of business challenges ranging from front line product support and operations to sales and marketing efforts. My core expertise is in software development building enterprise level web applications.