Setup custom domain on Azure Blob Storage behind reverse proxy
Written by Zack Schwartz
Hey there! If you're reading this, you're probably wondering about the nitty-gritty details of how we run our website here at https://raytha.com. Well, let us tell you - we've got the Raytha platform all set up and running smoothly on an Azure Web App, with all our files safely stored in Azure Blob Storage. But wait, it gets even better - all our requests go through Cloudflare, which acts as a reverse proxy and gives us that all-important SSL protection and all the other goodies it has to offer.
Now, here's the thing: when we first connected our platform to Azure Blob Storage, our files were being served up under the default Azure Storage Account name. And to make matters worse, we were missing out on all the sweet caching benefits offered by Cloudflare. That's just not good enough for us, so we set our sights on serving those files from assets.raytha.com instead. But, as with most things in life, there were a few "gotchas" we had to watch out for along the way.
Update settings on Azure Storage Account
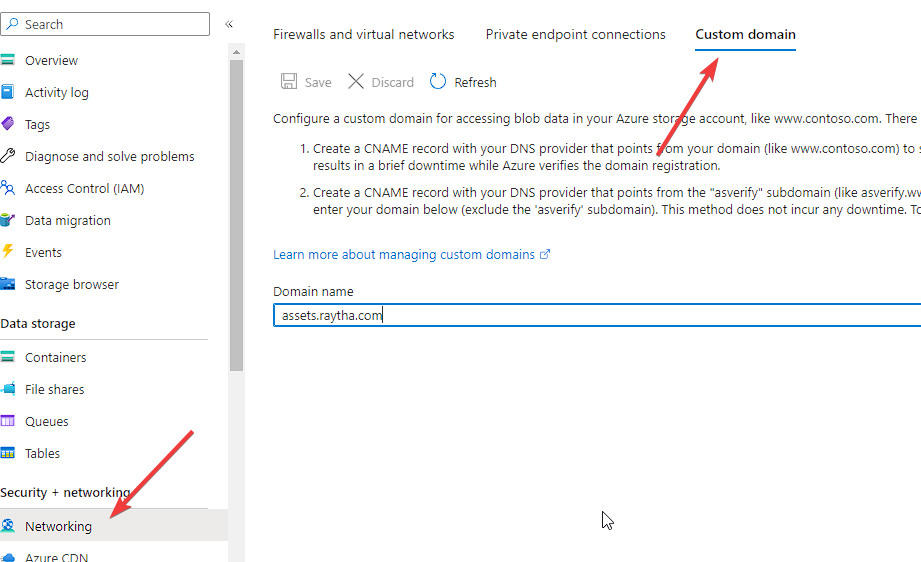
The easy part is to login to your Azure Storage account and click on Networking, and then click on Custom Domain.
From here, you need to login to your DNS provider and set a CNAME per the instructions in steps 1 and 2 in the screenshot below.
Enter your domain into the Domain name field. In our case, it was assets.raytha.com.
The Gotcha
A problem arises in that you will run into an http vs https issue. If you properly setup Cloudflare, you should be able to route traffic to https://assets.raytha.com/route-to-file.jpg, etc, but Azure Blob Storage will be on http. Azure Blob Storage has no awareness that all your traffic is coming through Cloudflare and https so this causes some permissions issues.
When we upload files or get SAS urls by using BlobSasBuilder in our .NET application, we specify the protocol as SasProtocol.HttpsAndHttp as shown here:
ENTREPRENEUR & SOFTWARE ENGINEER, AUSTIN, TX I enjoy tackling a wide array of business challenges ranging from front line product support and operations to sales and marketing efforts. My core expertise is in software development building enterprise level web applications.