Create or edit a page, post, or custom content item
Manage your dynamic content items by creating, updating, or deleting individual posts.
Create or update a content item
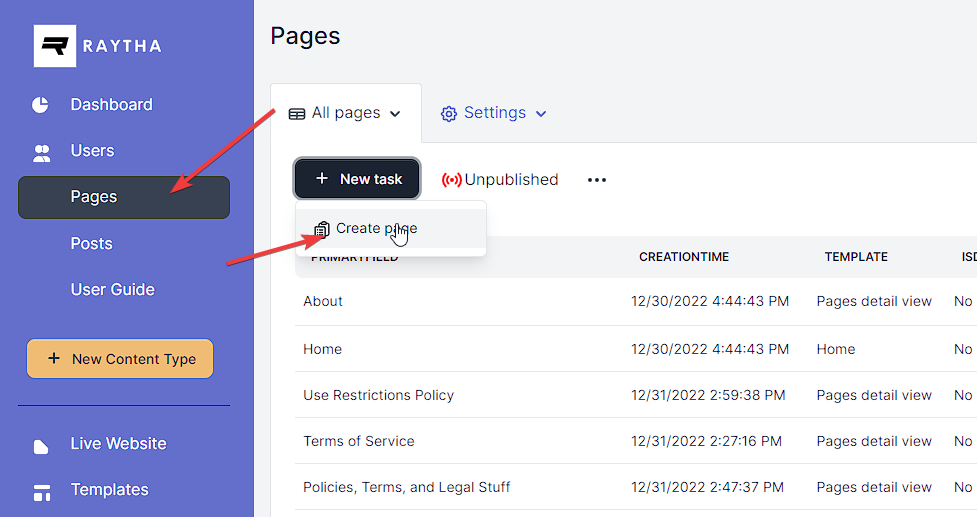
By default, Raytha has two content types called Pages and Posts, but you can also create your own custom content types. To access and manage your content, you must have a role with the necessary permissions. To get started, go to the Content Type in the left side navigation and click on New Task, then Create [content type].
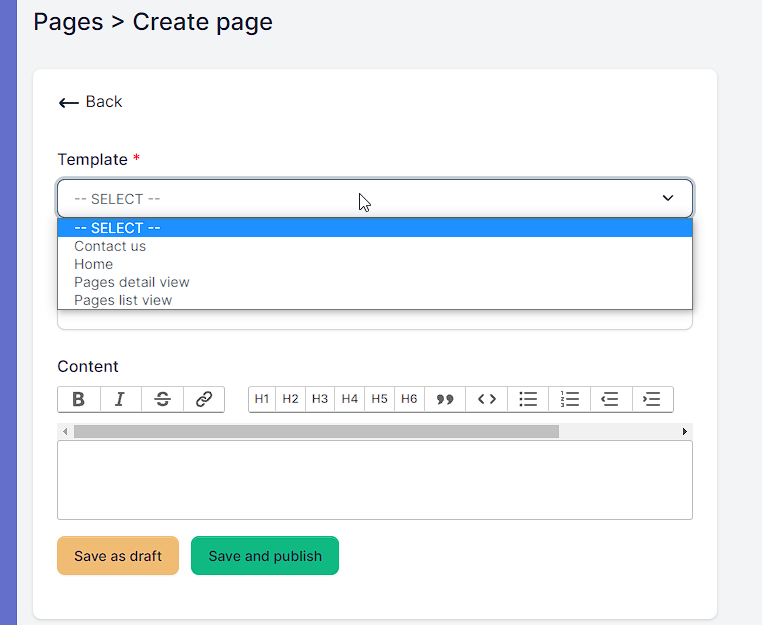
When creating a new content type, you'll need to choose a template for the individual content item. Typically, a "Detail View" template is used for displaying a single content item, while a "List View" template is used for displaying a list of content items. Raytha comes with default templates called "Content item list view" and "Content item detail view," but you may have additional templates available depending on the content types on your website. Make sure to select the appropriate template for the content you're working on, but keep in mind that you can always change it later.
Your content item might require fields defined by the administrator who configured that content type. Field types may include:
Single line text
Long text
Radio (multiple choice)
Checkbox (single checkbox, yes or no style)
Multiple select (list of checkboxes)
Date
Number
Attachment
One to one relationship
Most of the fields are self explanatory, however, special note should be given to the attachment fields and one to one relationship fields.
Attachment field
This is a file upload field. The system administrator may have set a file size limit and/or file type limit. Talk to your website administrator if you are not sure what can be uploaded.
One to one relationship field
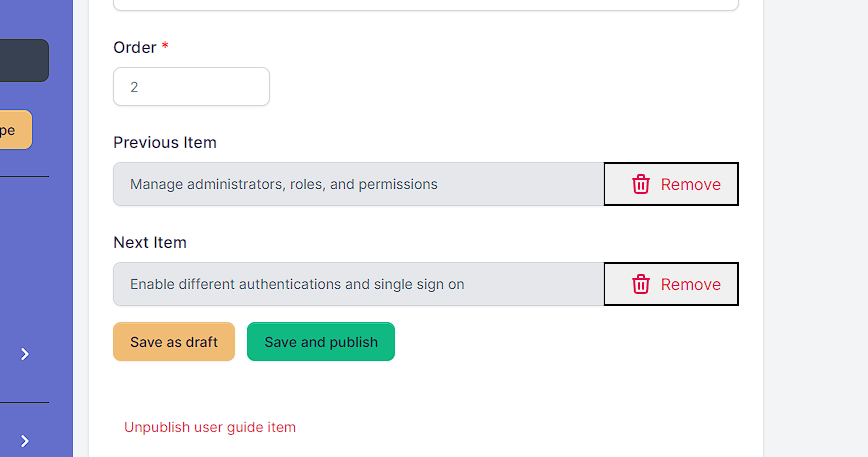
This is a special field type that allows you establish a link between content items. It can be set to refer to the same content type you are working within, or another content type. Where is this useful? For example, this user guide that you are going through has a section at the bottom of each article called Continue learning. It highlights the current article you are on, but also has navigation links to the previous article and next article. This is possible because the User Guide content type on raytha.com has a Previous Item and Next Item one to one relationship fields on its content type.
One to one relationship fields search on the Primary Field configured on a content type. The Primary Field is set under a content type's Configuration and can be any single line text field. More on this a little later.
While editing your content, you can save your progress by clicking Save as Draft at the bottom of the page. This allows you to come back and finish editing later. When you're ready to make your content live on the public website, click Publish. If you need to remove the content from the public website, but keep it available in the admin portal, you can click Unpublish.
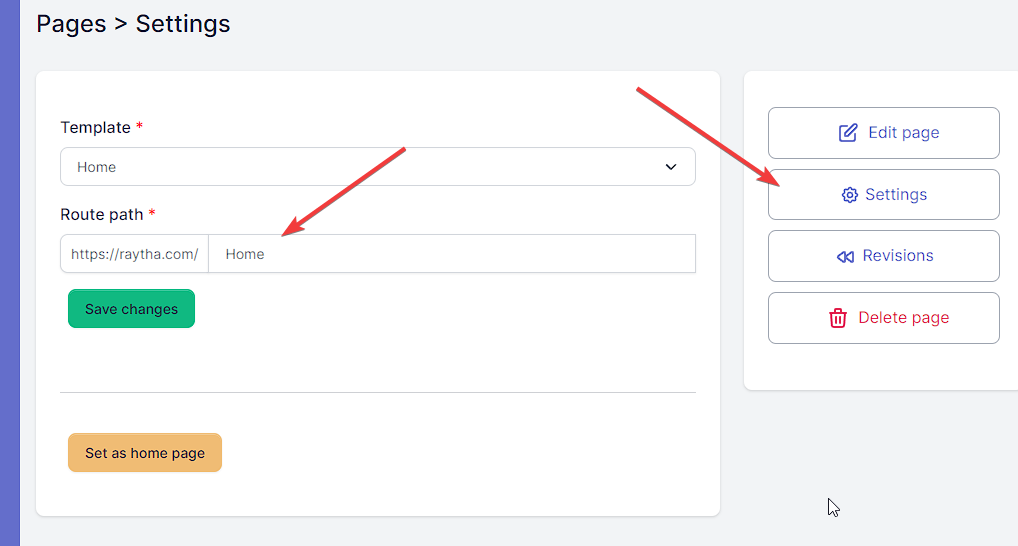
Customize the route path
The URL or "route path" for a content item is the address that follows your base website domain to access the content. For example, the route path for the following URL is "/about":
https://raytha.com/about
By default, the route path for a content item is generated based on the Default Route Configuration set by the administrator in the content type's Configuration. However, you can edit the route path at any time by clicking Settings in the right side navigation.
We all make mistakes, and that's okay. If you need to revert to a previous revision of a content item, click Revisions in the right side navigation and then click revert on the revision you want to use. This will restore the content to the state it was in at that revision.
Screenshot showing how to revert Proceed to the next article in this user guide by clicking the link in the Continue learning section down below.